Installing Kwiro
Step-by-step guide to installing and activating the Kwiro AI Sales Assistant on your WooCommerce store.
Install Kwiro in Under 5 Minutes
Getting Kwiro up and running on your store takes just a few steps. No coding or technical knowledge required.
Step 1: Install the Plugin
- Log in to your WordPress admin dashboard
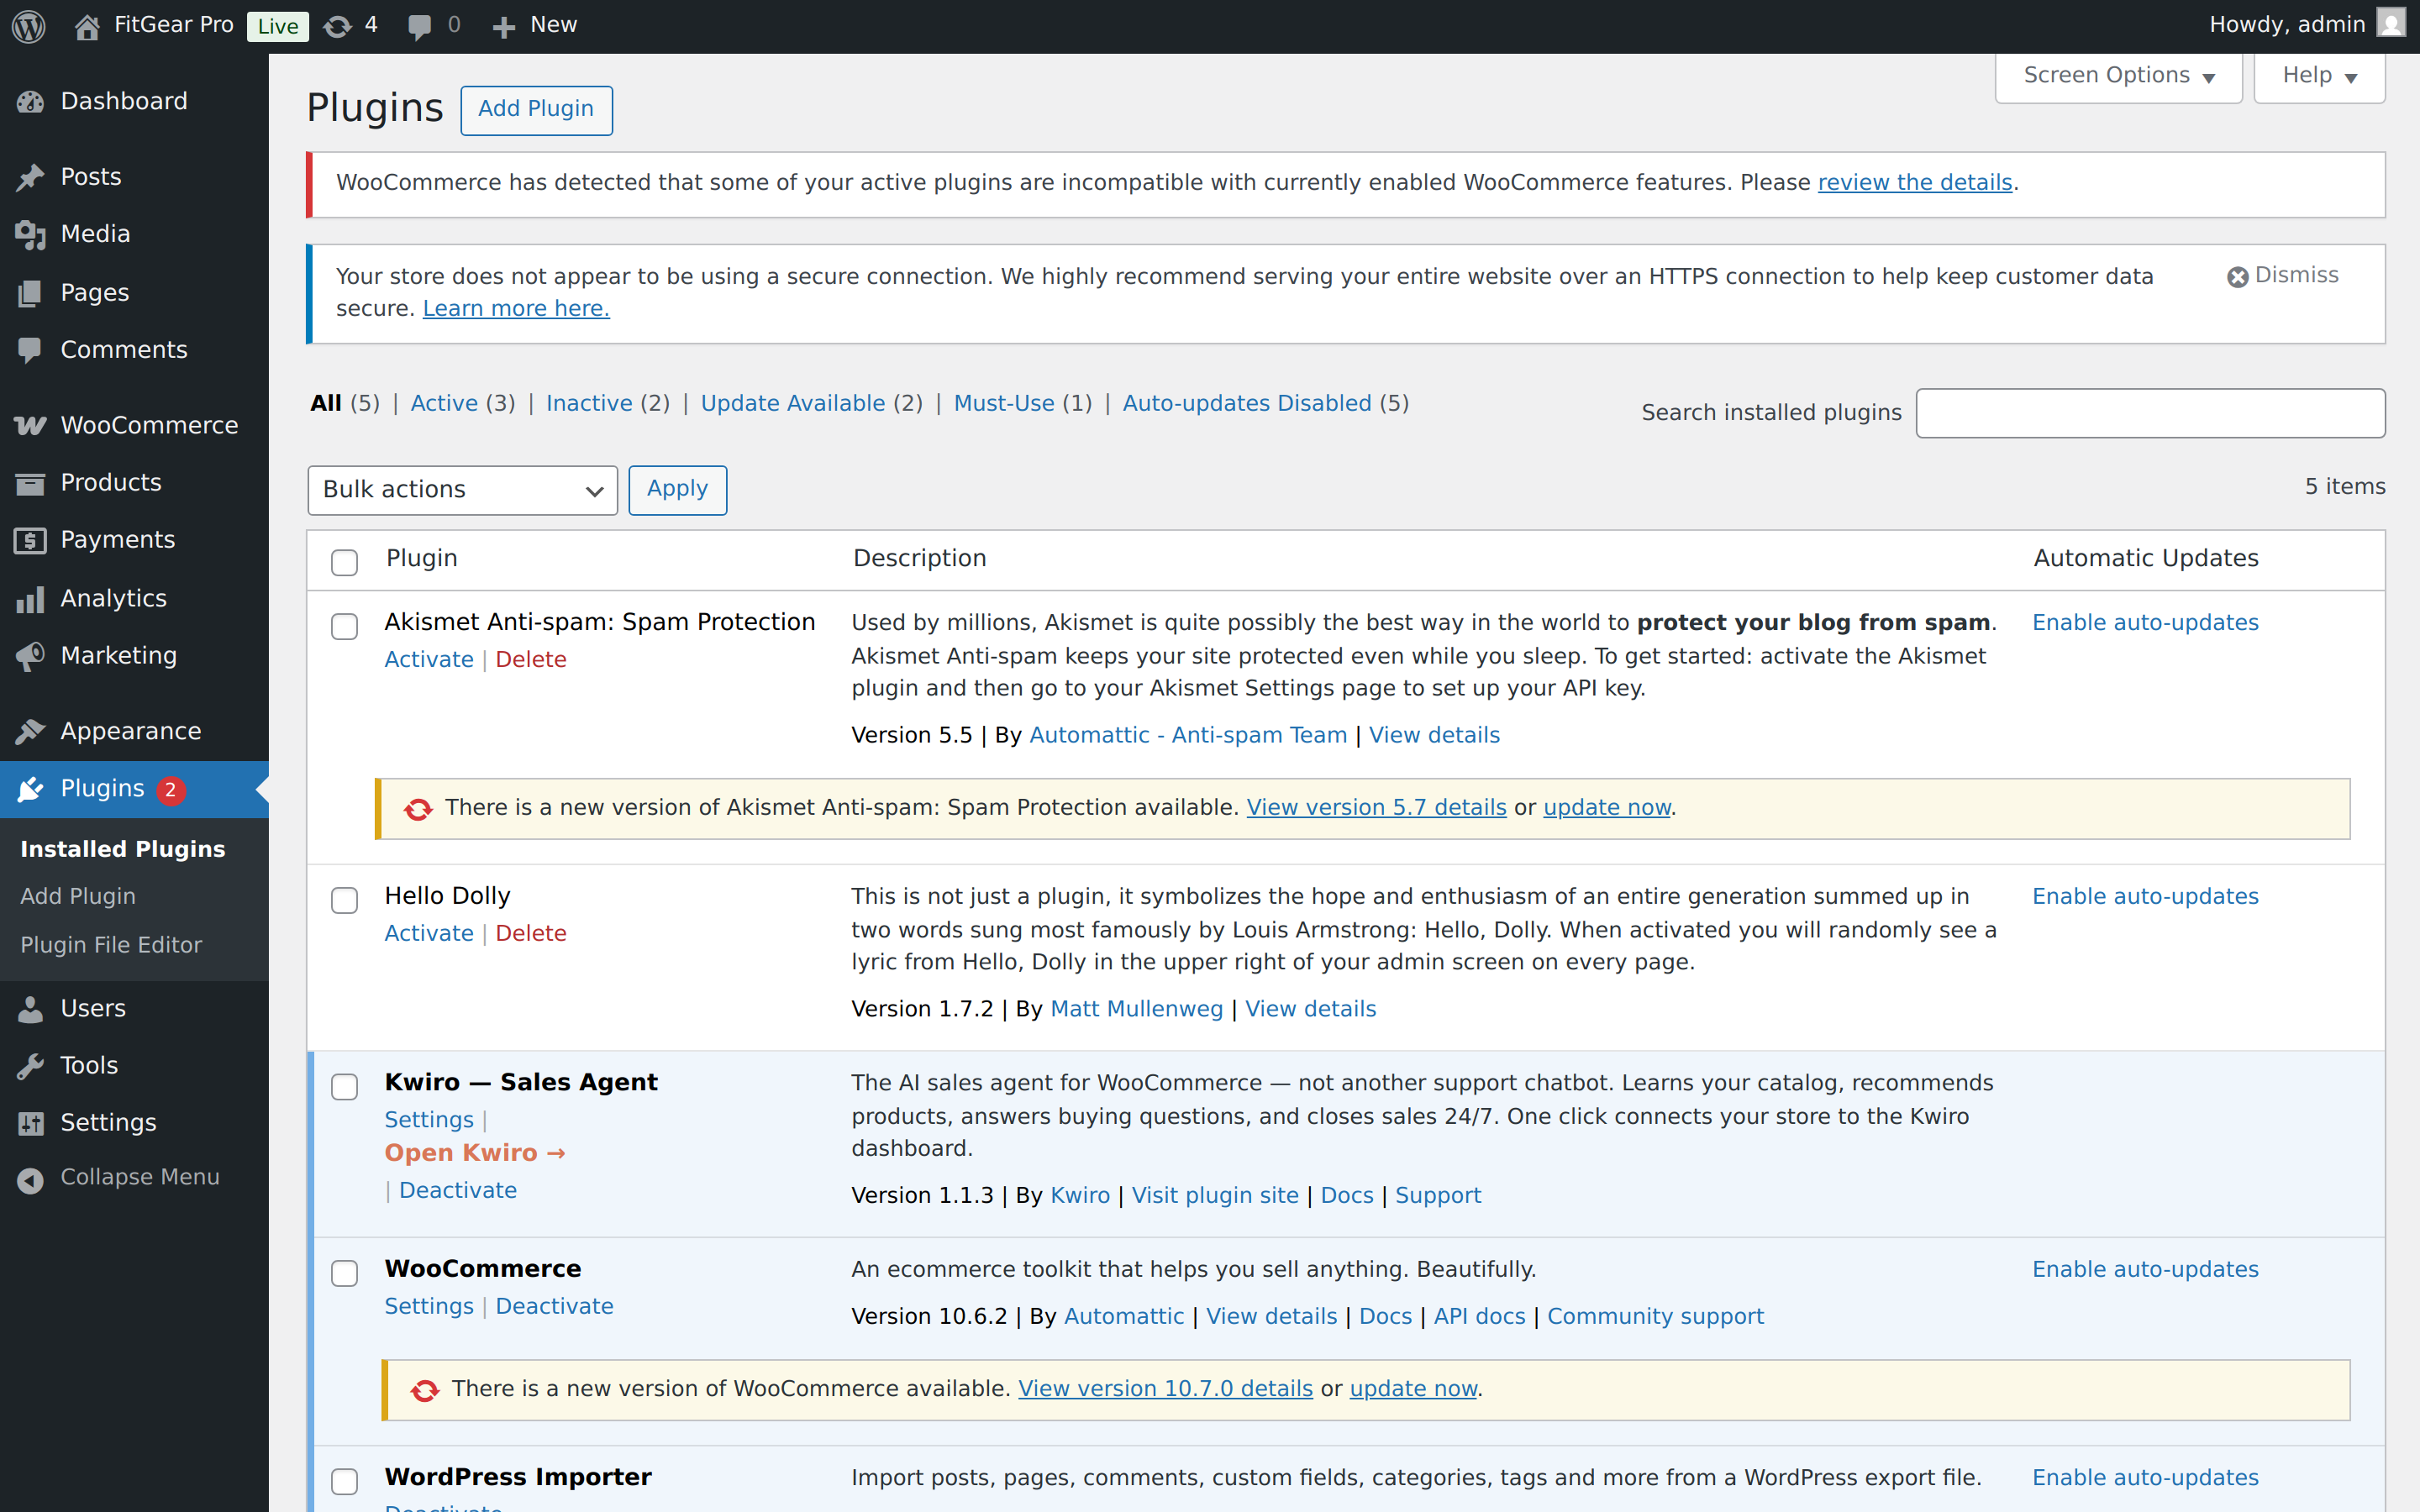
- Go to Plugins > Add New in the left sidebar
- In the search box, type "Kwiro"
- Find Kwiro — AI Sales Agent & Chatbot for WooCommerce and click the Install Now button
- Wait a few seconds for the installation to finish, then click Activate
Step 2: Connect Your Account
After activating the plugin, you will see a new menu item called Kwiro in your WordPress sidebar (under WooCommerce).
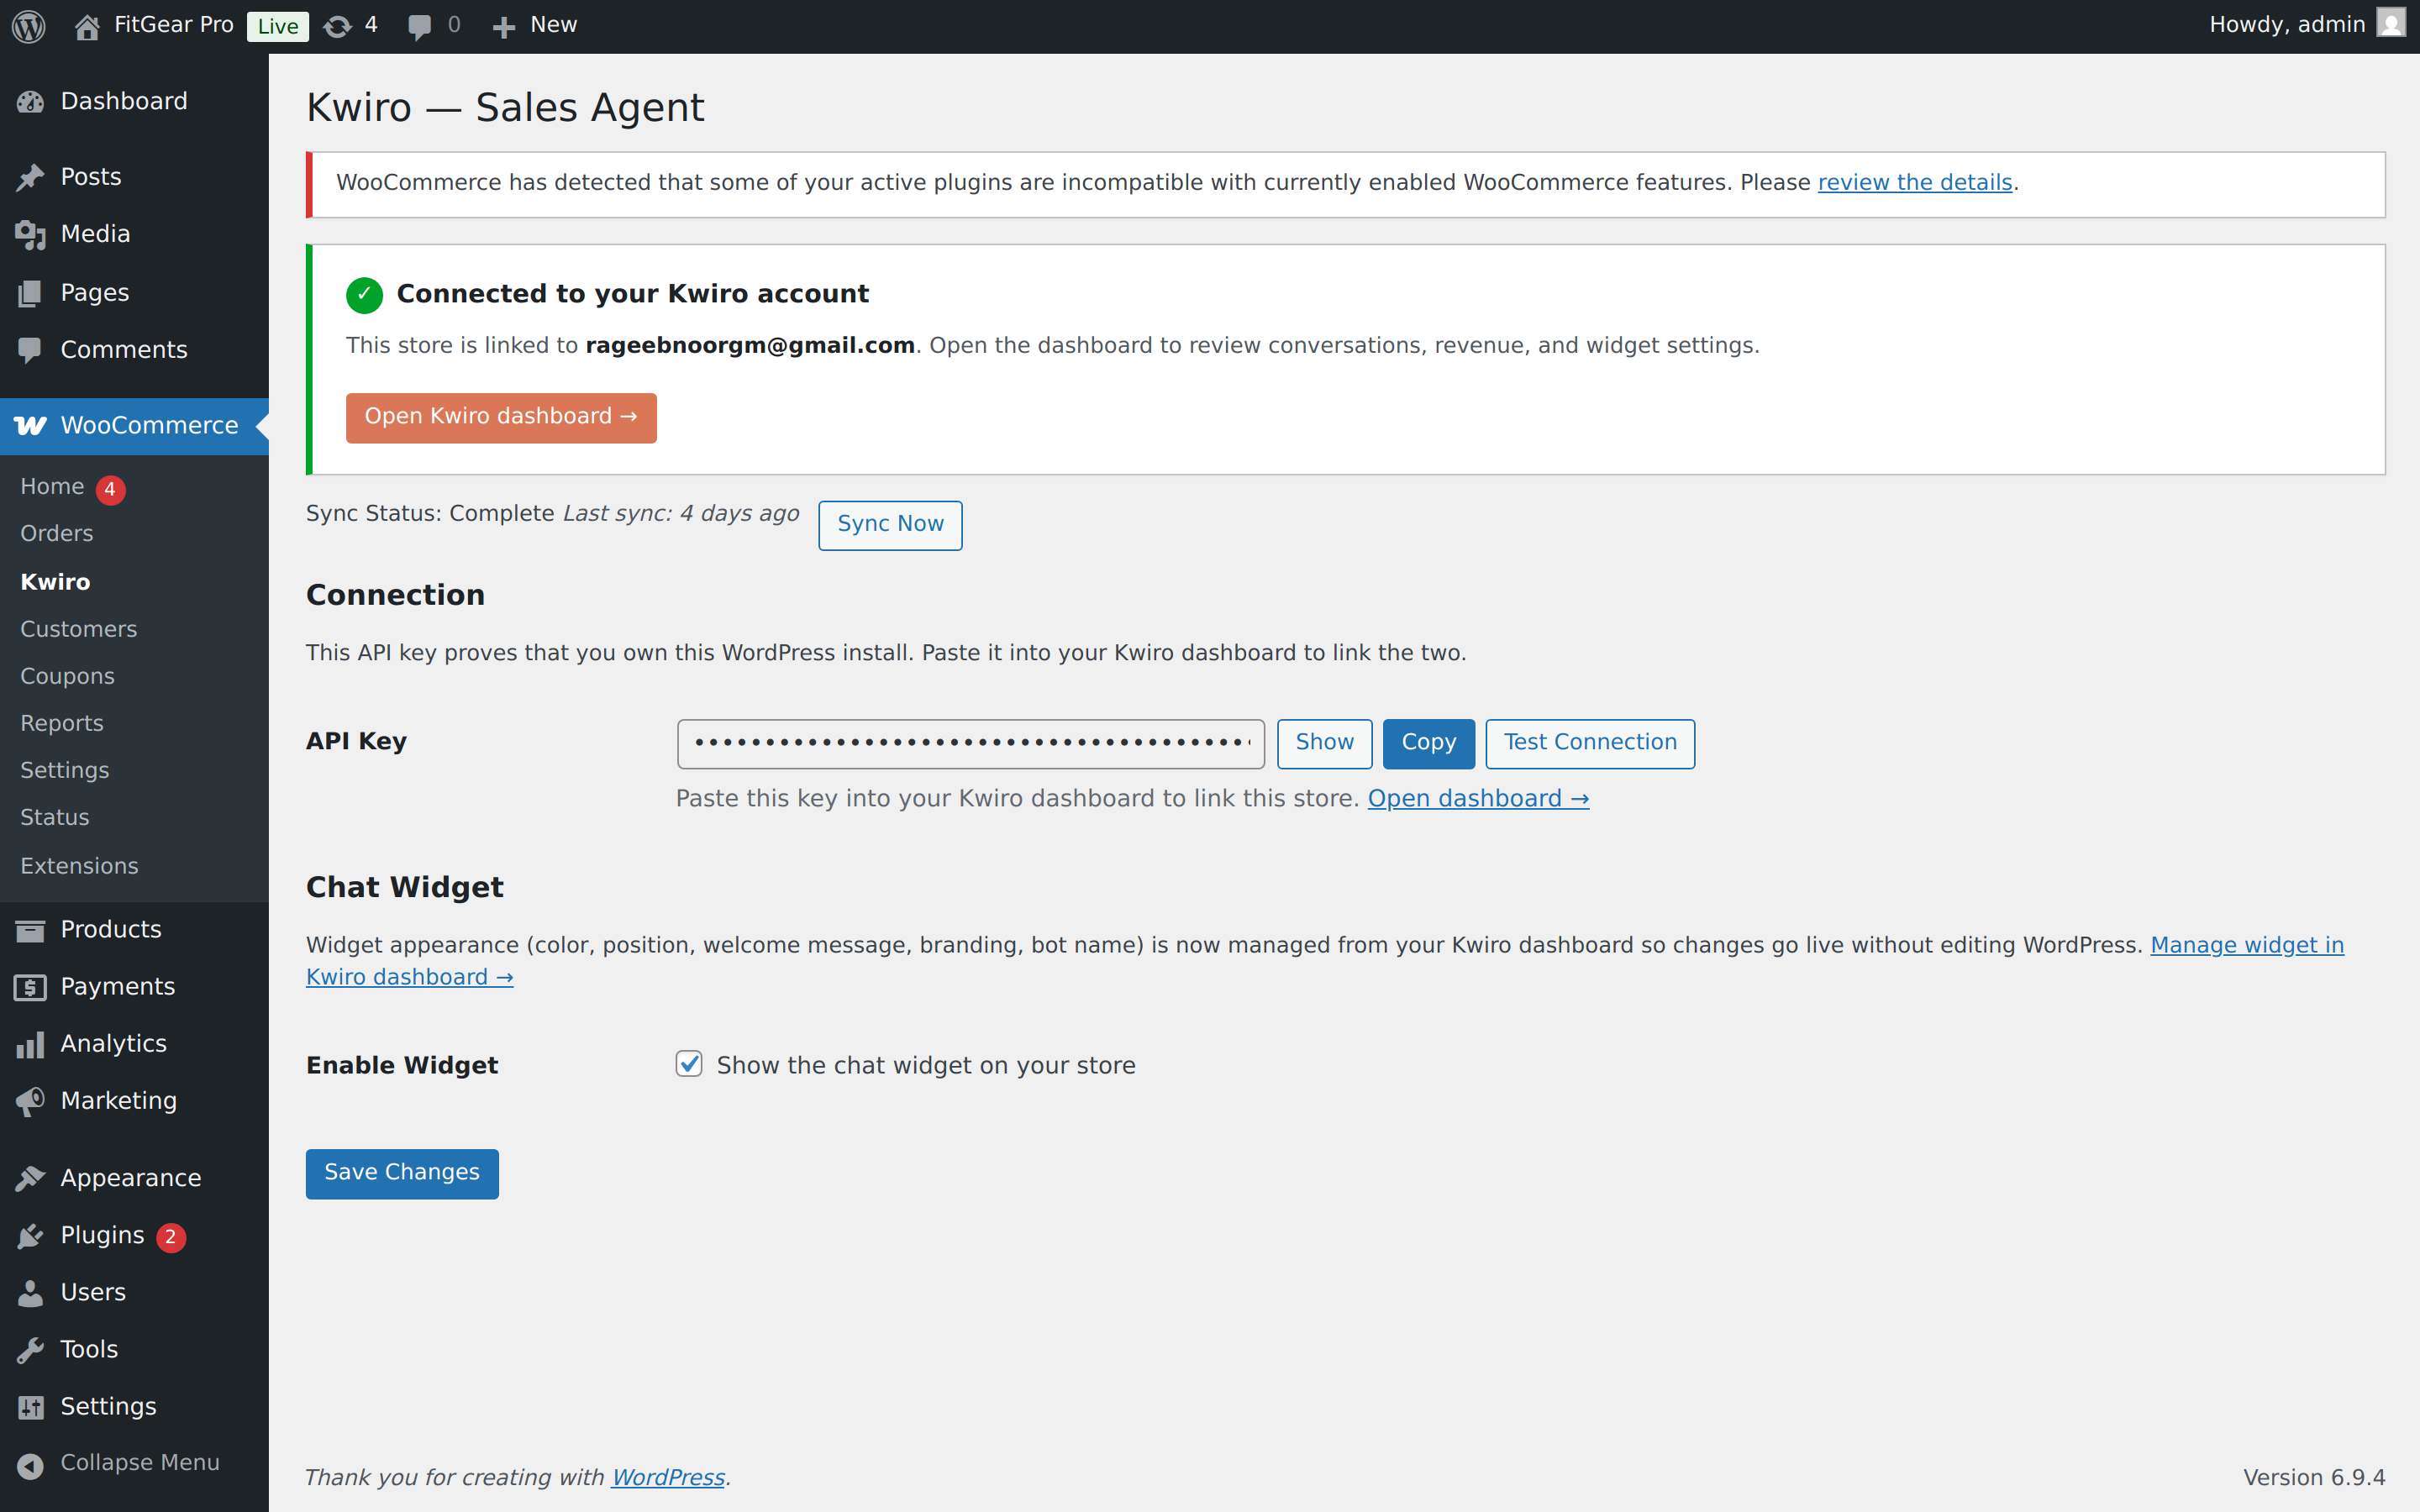 123
123- 1Green "Connected to your Kwiro account" banner. If yours is red, see Common Issues.
- 2API key — proves the link between this WordPress install and your Kwiro account. Treat it like a password.
- 3Enable Widget — controls whether the chat bubble shows up on your storefront. You can pause it any time without disconnecting.
- Click Kwiro under the WooCommerce menu to open the settings page
- Click Open Kwiro dashboard — that's where you finish onboarding (or sign up, if you're new)
- The dashboard auto-issues an API key and pastes it into your plugin
- You'll see a green "Connected" banner once everything is linked
You should see a green success message confirming your store is connected.
Step 3: Let Kwiro Learn Your Products
After connecting, Kwiro automatically starts reading your product catalog. You will see a progress bar on the settings page showing how many products have been synced.
- Small stores (under 100 products): Usually done in under a minute
- Medium stores (100-1,000 products): Takes 2-5 minutes
- Large stores (1,000+ products): May take 10-15 minutes
You do not need to stay on the page. Kwiro syncs in the background.
Step 4: Check That It's Working
Once the sync finishes, the status will change to Sync Complete. Open your store's front page in a new tab. You should see a small chat bubble in the bottom-right corner of the page.
Click it, type a question about one of your products, and watch Kwiro respond with a recommendation.

Having Trouble?
If the plugin does not appear in search results, you can download the ZIP directly from the Kwiro listing on WordPress.org and upload it via Plugins > Add New > Upload Plugin.
Related reading
Daily Use
Your Dashboard Overview
A guided tour of the Kwiro dashboard -- see your AI's performance, revenue impact, and customer conversations at a glance.
ReadCustomization
Customizing Your Widget
Match the Kwiro chat widget to your store's brand with custom colors, position, welcome message, and bot name.
ReadSmarter AI
Memory Inspector
Pin, edit, or delete what your AI has learned. The unique tool that lets you control the patterns Kwiro uses to sell.
Read